Signature workflows
Latest update: January 22nd, 2020
If you need to establish an signature workflow in your signing process you can add a workflow code previously configured by the administrator of your workgroup. Here is how to do it.
How to import workflow
If you are the group administrator you will see an option in the menu called "workflows". You will be able to import the workflows that will be used in the requests linked to this group.
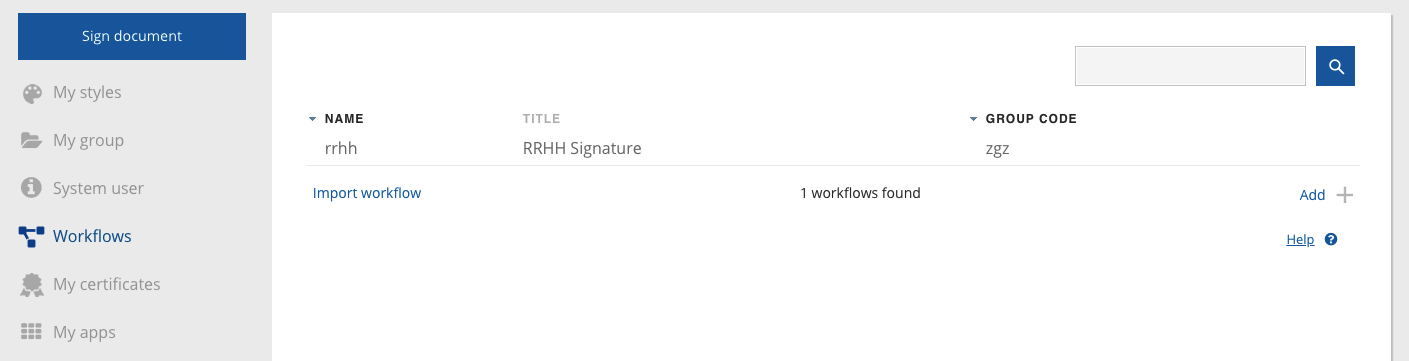
Setting up workflows is simple, and we will explain you below:
The workflow configuration file must be a JSON file, and shall have the following structure:
{
    "title":"string",
    "steps":[
    {
        "order":"1",
        "policyCode":"{{callto_policyCode}}",
        "type": "WEB",
        "recipients":"{{signer_2}}"
    }]
}
You can add as many steps as you need, and for each step, you will need at least to define the following:
| Attribute | Description |
|---|---|
| title | string; is OPTIONAL and is used to be displayed in the user interface when selecting or importing. |
| order | "string"; defines the order of the steps to be followed. |
| policyCode | "string"; template code to be used for the signing process. If the template includes signature policies, notifications, configuration, etc. it will be not be altered in the request. |
| type | "string"; you can specify "WEB" for remote requests notifying the signer by email and/or SMS, and "APP" if you want to send the document to Viafirma's app. |
| recipients | "string"; here you must specify the recipient of the notification, which will normally be the signatory. For example, "[email protected]". |
Dynamic values
As you will have seen in the example, the JSON definition supports the use of dynamic variables that will help you to simplify your work. You will only have to report these values in the metadataList or in the form of your requests, for example:
{
   "groupCode": "apisample",
   "workflow": {
     "type": "WEB",
     "referenceCode":"firma-RRHH"
   },
   "notification": {
     "sharedLink" : {
         "email" : "[email protected]"
     }
   },
   "document": {
       "templateCode": "firma-empleado-template"
   },
   "metadataList": [
   {
       "key": "signer_1",
       "value": "[email protected]"
   },
   {
       "key": "callbackMail_1",
       "value": "[email protected]"
   },
   {
       "key": "signer_2",
       "value": "[email protected]"
   },
   {
       "key": "callbackMail_2",
       "value": "[email protected]"
   },
   {
       "key": "callto_policyCode",
       "value": "firma-RRHH"
   }
   ]
 }
Among the values included in the metadata list are the values for policyCode and `recipients expected in the workflow, as well as other values that we have configured in the template for notifications during the signing process lifecycle, for example:
The employee {{signer_1}} has already signed the work contract and it is now ready to be reviewed and signed by the HR team.
or to automate the callbackMail to attach the contract signed by both parts:
Email addresses (comma-separated) that will be notified after completion: {{callbackMail_1}},{{callbackMail_2}}
Optional Attributes
Workflows allow you to use more attributes to adjust to the needs of each case, but we recommend using the minimum possible logic in the workflow and extracting the bulk of the logic to external configuration, for example, in the template itself or in the definition of your call (POST).
For requests sent to the Documents APP you will have to add the necessary attributes that will allow us to identify the device and user to whom we will send the PUSH with the document to be signed.
{
    "title":"string",
    "steps":[
    {
        "order":"1",
        "policyCode":"{{callto_policyCode}}",
        "type": "APP",
        "appCode": "string",
                "code": "string",
                "userCode": "string",
        "recipients": "{{signer_2}}"
    }]
}
For example:
{
    "title":"string",
    "steps":[
    {
        "order":"1",
        "policyCode":"{{callto_policyCode}}",
        "type": "APP",
        "appCode": "com.viafirma.documents",
                "code": "john.doe",
                "userCode": "john.doe",
        "recipients": "{{signer_2}}"
    }]
}
results matching ""
No results matching ""